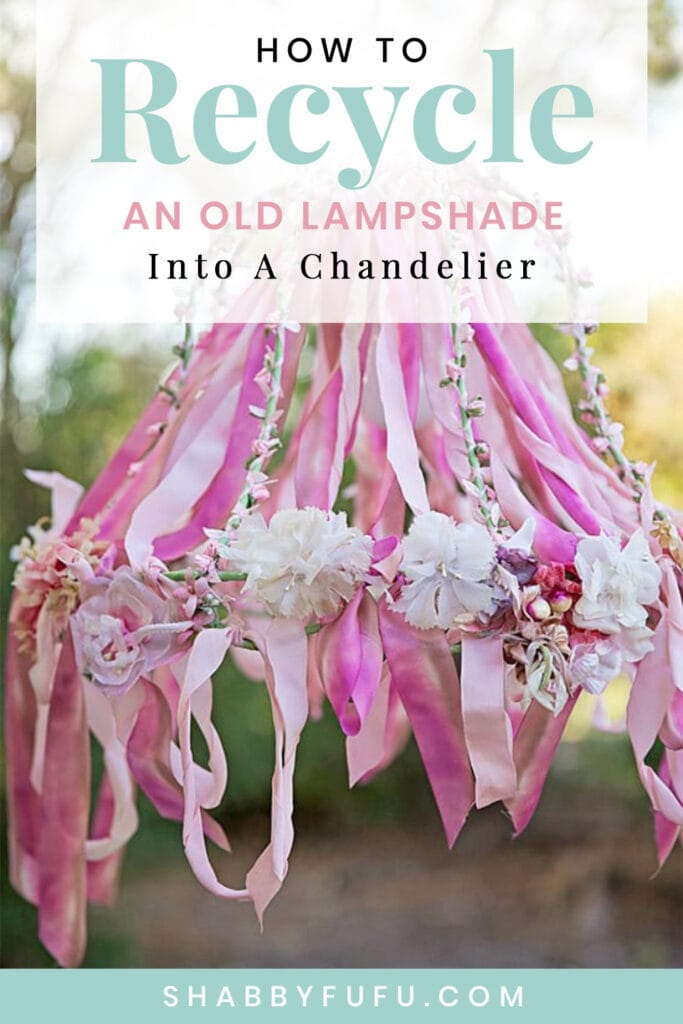
How To Recycle An Old Lampshade Into A Chandelier

Art and creating pulls at my heartstrings and I have been feeling the need to get into my studio and I knew that this project would be a winner.

I have been making chandeliers, lamps and lamp shades for many years now. The one above was made (and sold) quite a few years back, but I recently found the image on Pinterest again and thought that I’d share.

I had an orphaned large lampshade in my studio that has been sitting around for a couple of years, waiting for a fluffing of some sort…so out came the supplies today with a design in my head.

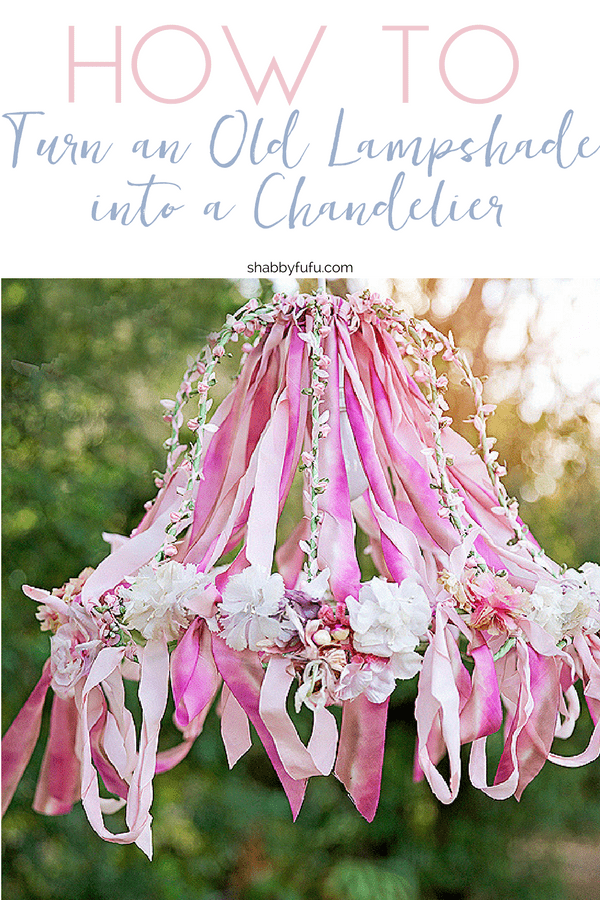
I began by wrapping the entire frame in green seam binding, as I wanted a garden theme.

Taking some time, I hand painted the most beautiful antique silk ribbon that I found in France.

You could also use silk sari ribbon that comes in a variety of shades and I love how the edges on these are tattered.

After the frame was wrapped in the seam binding, I wrapped additional layers of ribbon that have baby pink rose buds and also some ribbon with leaves attached.

Then I worked with more hand dyed silk ribbons in lavenders…tying, twisting and twirling until it looked pleasing to my eye.

Vintage millinery was added as the finishing touch. I pulled most of the millinery off old church hats from the 1950’s era.

I added the electrical component and it is now a working chandelier that is made to swag. The perfect end of day time to shoot it in the “golden hour” with some lovely light…

Extra Tips
Once you are satisfied with the look of your lampshade chandelier, the final step would be to electrify it. In this project I used a hanging lantern light kit with a plug at the end and put it through the center part of the top of the completed chandelier. The cord on these are pretty heavy duty, so you can simply wrap around a tree branch a couple of times to hang. If hanging outdoors, be sure to plug into a grounded outlet and remove when not in use.
These are so pretty for a bridal shower, farmhouse style outdoor wedding, baby shower, etc!


I love your afternoon creations. Such a wonderful way to relax and unwind when your busy.
I love love love love this, Janet! So whimsical and sweet! You are truly one talented artist, my friend. Love the way you create so much beauty from bits and bobs. ♥
xoxo laurie
I just love it, love your ring too
This is awesome–would look awesome at my daughters wedding–now I want to make one 🙂
This is just beautiful and so creative. I just really love it. I agree with Sandy, it would look amazing for a wedding. What a fun afternoon project
Wygląda bardzo pięknie i romantycznie – pozdrawiam serdecznie
How cute! Isn't it cool when you find pictures of one of your projects on Pinterest? I am always so thrilled, lol.
Such a gorgeous, gorgeous chandy!…I can see many people quickly gathering supplies to create one of their own…thanks for sharing!!!
great pics
beautiful
https://obatherbaluntukfaringitis33.blogspot.com
So beautiful. Love this one
So many beautiful elements here. So sweet!
This is so cute! I love the colors and the freshness that speaks spring. I need to get back to creating too. I feel lost without it! Glad you got some creativity time! Hugs, Leena
So beautiful and creative. Love the hand dyed ribbons also.
Janet,
Gorgeous! You are a talented woman.
Happy Creating,
Karen Marie
Might we see a "before" picture of the bare base? Thanks! It's beautiful!!!
I just love this — so pretty, so romantic!
Thank you, Janet!
This is just beautiful, just the right amount of pretty!
Such a pretty chandelier! My daughter would love this in her room.
This is so beautiful! Looks amazing in the sunlight!
Janet! I am in love with your beautiful little ribbon work chandeliers! Soooooo pretty! Thank you for sharing! I have a few shades that are bare and could use something like this to pretty them up! I hope you have a great week!
Smiles!
Terry
That is so pretty!! I am seeing one of those above a rustic barnwood table or in a bedroom.
Pinning this!
This is darling, and I love how feminine and frilly it is! Thanks for sharing at Merry Monday! 🙂
Simply adorable, I would love to try this!
Jenna
Gah! This is gorgeous! I just want to set up a tea party underneath it right now. Thanks for sharing!
It's wonderful, my Neice is getting married in November and these would be great even done up in all whites and hanging about, even small mini shades on mini lamps as center pieces.
I am do warding it to her Mother now!
Xx
Dore
This is so sweet!! Reminds me of the Maypole we danced under in First Grade. Special memories. And, this technique can be used on so many things, not just a chandelier. Thank you for this, Janet!!! Muah!! <3
~Donna @ BelleWest