I hope that you had a great weekend friends! I was up at the beach working on something upcoming for print, and didn’t have much chance to relax…but that will wait until another time. I have several good things to share with you soon and can’t wait to show you! Life isn’t always perfect and we’ve been dealing with some personal things, but the creative part is a great take over and release when the stress of every day situations set in. I’m so thankful for that creative right brained side that is busy working on projects. Today I’m sharing something that I haven’t talked about in awhile, and it’s a DIY for those who love the farmhouse style and/or French farmhouse style. Read and and you’ll see what it’s all about…
How To Make A French Farmhouse Style Mason Jar Chandelier
I’m not really sure that my home style has a definitive name as I’ve mentioned before, but I am inspired by the homes that I’ve visited in France like
THIS gorgeous French country home and then
THIS breathtaking French Country home. They are definitely worth a look if you haven’t seem them here and you may just recognize one of the homeowners who is a well known French artist.
When I set out to make my Mason jar chandelier it was back quite a few years ago and at that time I don’t think that anyone else was doing them to my knowledge. It came on a creative whim, thanks to my husband bringing me home a rusty crusty vintage chandelier that was found in a heap of trash on a construction job site. He’s well trained :~) Our MASON JAR LIGHT is different…more on the designer side I think.
Just Google Shabbyfufu chandeliers and you’ll find something that looks like this and you can see that I’ve make hundreds of different kinds of lighting over the years! I’ve moved on to other thanks, but I have a client that I’m making 3 MASON JAR LIGHT FIXTURES for right now and I thought ….why not share a few tips for you DIYers on how I do them…
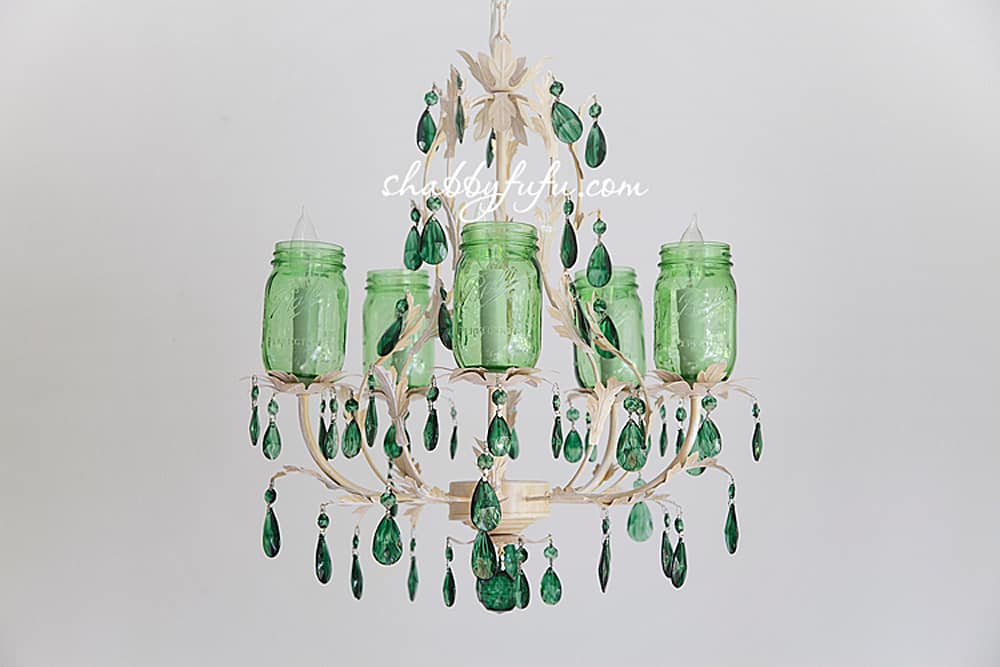
This is the rusty chandelier that started it all and you may have seen it by now somewhere on-line. It was so clogged up with rust from the Florida climate that it couldn’t really be rewired so we decided to make this one into a “candelere”…lit only by candles. Truth be told we don’t light it up very often, so it’s really more just for a pop of color than anything else.
Since we couldn’t electrify this one we drilled small holes to just lay the jars on top of the holes where the original electrical came out. We stripped the wiring and took off the sockets and the jars just sit there nicely. The candles need to be lit with a long lighter and the wax collects in the bottom of the jar without dripping out.
It just worked out that way.
The chandelier drops are a combination of long and pendant shaped. The long green vintage chandelier droplets I found at a brocante market in France. Knowing that some day I would use them, I brought them home with me. I love when that happens…it’s almost like somehow I knew beforehand.
These vintage chandelier crystals I colored to match the jars and there are a couple of different ways to achieve that look. You can use a product like school glue or Mod Podge and food coloring and I love to do that to change the shade of jars around the home. Lucy of Craftberry Bush has a great
TUTORIAL on that and her blog is always a favorite!
I used the Pebeo Glass Paints for mine…and here is where to find the AQUA and the THINNER {affiliate links} and it’s where I order mine…
We make the holes in our jars with a DRILL PRESS and my husband recommends the one that he purchased on AMAZON. It’s A Rikon brand and has great reviews…you can find that HERE. He uses a 3/4″ diamond bit to make the holes, which once again you’ll find HERE. You’ll also need to purchase cutting oil that needs to be sprayed on the jar as you cut it so that the glass doesn’t overheat and break.
DISCLAIMER: PLEASE BE SURE that you wear goggles and heavy duty work gloves when you cut glass, because there is always the risk with glass of it shattering! It’s a good idea to build a jig with a vice and two 1 x 4’s to brace the glass jars so that you don’t have to hold them in your hand while cutting. This project would be better for a more advanced DIYer to take on…
This is similar to what we will be making for a client who has a farmhouse style home and she requested clear jars for hers. There are lots of chandeliers out there that you can purchase ready made but I love vintage and if you have a farmhouse decor you can take this style as far as you’d like!
Teacup CHANDELIER PROJECTS below!


I love the blue chandelier with the hanging crystals. Do you sell them? I’ve been trying to search all over to find one to purchase.
Hi Tasha. We used to make and sell them by the score, but don’t do that any longer unfortunately.
hello, I love your designs and really love the Mason Jar Chandeliers! I am retired now and have searched my home for the tutorial you printed a long time ago for the beautiful chandelier in your kitchen. It is not to be found!!!!Would you please send me that link that describes how you took the chandelier apart and remade it ? I would be so grateful. Thank you. Have a wonderful week.
Respectfully,
JoAn Phillips
[email protected]
Hi JoAn! As mentioned in the article (blog post) this one was too rusty and couldn’t be taken apart to be rewired, so we made it into a candle light fixture. Other than that the instructions are in the blog post. Good luck with the project!